Sunday, May 31, 2009

Tomato Planting

This weekend, amongst many other tasks, I managed to plant the remaining five tomatoes into the garden. The other 11 plants were planted last weekend. I was holding off planting the last five due to lettuce, spinach & radishes that needed to be eaten to make way for them. We ate all the radishes & spinach but didn't make it through all the lettuce. I decided to just plant the tomatoes within the lettuce and then harvest the lettuce as needed. Here are some photos of how I planted the tomatoes and a photo of each tomato area.

This is a consensus of what all the tomatoes looked like before planting.
They are sturdy but rather long from being to close together. They all are
about 24" high.

I always plant my tomatoes deep as they root along the stem
but these ones were planted particularly deep. It's hard to see
from the photo but they are 12" deep.

They then all got a stake and tie.

Followed by a tomato cage. These particular cages are about
double the thickness of your average tomato cage and a little taller.

This is the group of tomatoes that I planted in the raised beds. This is my first
time growing tomatoes in soil, previously I have grown tomatoes in large
containers for the past 5 years. I am hoping they develop better in real soil.

These are the three topsy turvy's. They are growing really well so far.

Finally the last tomato group in the oak barrel. These ones are 'Jersey Devil'
paste tomatoes and they seem to be limping along. I am hoping for a rebound
if it ever warms up.

Friday, May 29, 2009

Seeding Veggies Again

The time has come to start the second crop of broccoli from seed. It seems it is all happening fast now. I started them the evening of May 28th and I plan on transplanting them into the broccoli bed around July 1st. Last year the broccoli was harvested June 18 so this should leave enough time to harvest a few broccoli side shoots before the new crop replaces them. I also took the opportunity to start a few other things that will be late plantings, here is a list of them all:

  • 12 Early Dividend Broccoli, 43 days to harvest
  • 4 Jade Cross Hybrid Brussels Sprouts, 95 days to harvest
  • A community pot of Musselburg Leeks, 90 days to harvest (these will replace the garlic after it is harvested)
  • 4 Red Celery, 120 days to harvest (this is the first fall crop I am starting, as you can tell they need a big head start with their days to harvest. These will be planted in the poly tunnel in July, uncovered of course until probably Sept.)

With all that seeded and placed in the propagator I moved on to soak all the bean seed I am planting today, Friday. I could have started these a while ago but my procrastination got the better of me. Good thing beans grow fast so no need to worry about being a little late. This year I am growing the following beans:
  • Kentucky Blue Pole Beans
  • Purple Podded Pole Beans
  • Dragon Tongue Bush Beans
  • True Red Cranberry Bush Beans (from The Conservative Gardener)

Thursday, May 28, 2009

Nature at work in the veggie patch

I was photographing this Garter Snake on Wednesday. Garter Snakes are a pretty common sight in our yard, some of them are pretty huge too. I took a couple photos and then moved on to finish building the melon trellis. About 10 minutes later I went to find a tool I needed and found that the snake was eating....

this toad. My first thought was to make it let go but then realized that's what it eats so I let it be. I was really surprised a snake with such a small mouth could eat this big toad but it did. It took about 15 minutes and once it was past its jaws the toad moved very quickly to the center of the snakes body. Very interesting to watch.


I was happy that it didn't eat this red toad that I have seen in the patch many times this spring. I have never seen a red toad before and might have had to kick some snake butt if it had this one.

Wednesday, May 27, 2009

Garden Update

Here goes an overall update on the veggie garden. I will start with the peas. They have just started to grow fast after planting transplants on April 27th.

These are the sugar snaps growing in a terracotta pot. They are growing a
little slower then I want but at least they have started to do something.
Once the heat does these in in July I will be planting a white cucumber in this
pot. The variety will be 'Pearl Hybrid' and has a days to harvest of 57 days.

Here are the 'Green Arrow' shell peas, they are starting to do
very well. As you can see they are just starting to flower.

This is the broccoli, kohlrabi & romanesco broccoli bed. It is also
interplanted with onions sets and a row of radishes that are now
ready to harvest. The trellis behind them will be planted with
squash very soon. Looks like I need to start planting the second
crop of broccoli.

Here is a fuzzy photo showing the broccoli are 20" high. I
am guessing they will be harvested in 3-4 weeks now.

The kohlrabi are about the size of a gum ball. I can't wait to try these.

Here is an overview of the broad beans, bok choi & romaine. You maybe be
wondering what all the yellow flower are? Well those are all the bok choi
that have bolted. They were perfect baby size but I held off harvesting for a
few days and every one bolted. I hope for better luck with them this fall.
They will be composted and replaced with cranberry beans tomorrow.

Here are the beauties of the patch, crimson flower broad beans. The flowers
smell amazing and on humid days they perfume the whole area. These are
keepers for sure!

The romaine is going gangbusters. I have 16 heads like
this and they badly need to be thinned to 8 heads. We need
to get eating!

This bed is multi planted onions with beets, carrots & lettuce planted
in between. The trellis behind them will have cucumbers very soon.
The carrots and beets are not growing very fast. I think this is from the
dry spell we have been having, This evenings rain is much needed.

Here is the spring greens & radish bed. Most of it has now been harvest only leave a
little lettuce to go. Once the lettuce is gone I will plant the remaining 5 tomatoes here
and do a post about all of tomatoes in the garden. To the end of the bed is garlic and
along the front is onion sets.

Even thought I will soon do a post on all the tomatoes, I had to
share of photo of mister early. He has loads of flower buds out and....

one big fruit, it won't be long now. I can taste the BLT already, yum!

I will end with what I am calling my bird poop strawberries. I noticed a small
strawberry plant growing in one of the perennial gardens last summer. This
spring it grew into one large plant with two off shoots so I planted them up
in this window box I had in the shed. I did not plant them so they must have came
from the birds, thanks for the free plants birdies!

Monday, May 25, 2009

Growing Potatoes In Compost Bags

This season I am going to try growing three early red potato plants in compost bags. I have seen this done on Jamie At Home a while back and then saw it again on Down on the Allotment. I thought I would give them a try this year so I can have some red potatoes. Here is how I went about planting them:

First I sprouted some early red potatoes from last years garden.
I was lucky to find these lingering in the crisper, they are a little
small but they should amount to something.

I started the planting by jabbing some holes
in a typical sized bag of top soil for drainage.

I then cut the bag open, removed & stored half the soil and rolled
the top down. I then stuck the seed potato into the bag and topped
that will a few inches of soil.

I then grouped them together in the new lower bed I am putting in
for potted potatoes & tomatoes as well as herb, rhubarb and sunflowers.

Now my only concern is light penetrating the bags and turning the potatoes green. By the time they start growing I will have double bagged them into black plastic bags to stop the risk of having green potatoes.

Once the plants grow about 6" I will roll the bag up, fill it with the remaining soil to replicate hilling and hopefully harvest some early reds in July. If this approach works well I will start them early in the poly tunnel next year for an extra early crop.

Sunday, May 24, 2009

The New Bamboo Bean Trellis

Last year I grew the pole beans on the trellises I made out of 2x2's and trellis netting. They grew great but it had a few short falls. First being that it was not tall enough, they grow 6' or taller. The second and worst short fall was taking them off the trellis netting in the fall. They really wrap tightly and it took forever to clear them out. So with the bed expansion I did this spring I decided to build a different trellis for the beans, here it is:

It is made out of bamboo and compostable string for the beans to climb on. It was really fast to put together, it took maybe 15-20 minutes and was really inexpensive. Best of all in the fall I can just snip the string and put the whole lot in the compost. It is also reusable asides from the string and will last at least 5 seasons. The one I built is about eight feet high, five feet wide and one foot deep. If you are lucky enough to have space it would work great spread across a 36"-48" bed. Here are some closeups of how it is put together encase you want to try one yourself:

First I could only find 6' bamboo poles so I got 2 extra to extended them. This was done by drilling a hole through both pieces, the string was then threaded through the holes, wrapped and tied. These poles ended up being about 9' long leaving extra length to sink in the ground.

Then two poles were sunk into the ground at the width you want the trellis and then pulled together at the top. I then just wrapped the string tightly and finished with a square knot. This was then repeated on the other side. Once both sides were in place the top rail was pushed into place to add support and a place to run the string.

The last part of the frame is to install two horizontal piece of bamboo across the front and back. Like at the top I just wrapped the string around a bunch of times and then tied a square knot. With all the frame together I then added the string about 6" apart. I started by tying the string around the back piece of bamboo, then I wrapped it around the top piece of bamboo a few times and finished it by tying it to the front piece of bamboo.

Friday, May 22, 2009

New spigot, planting & to do's


I wrapped up installing the new garden spigot today. I have been tinkering at it for a few days so it is nice it is finally done. Previously the spigot was at the back of the house and I kept knocking down all my plants with the hose so I moved it. I had to run about 12 feet of copper pipe and then tie it into the freeze proof spigot outside. I am happy to have a freeze proof spigot now because I have froze our previous one a few times. That's how I learned to solder.

Last weekend I built this to hold the hose reel that is also a new addition. I am running an underground pipe from the new spigot to this post that will be against the hedge. Once it is installed it will keep the hose away from all the gardens which will solve the problem of knocking down all the plants. It will also be nice to not have to step in the bed to get at the hose now either. I will post a photo of it once it is all set up.

I then planted three 'Jersey Devil' tomatoes in the oak barrel. These tomatoes are a paste type tomato and will be used for salsa and maybe tomato sauce if enough are produced. Unfortunately the multi-seeded lettuce never grew fast enough so they went in the compost. I know now to plant the whole barrel in early April in order to harvest it late May.

This year I am using heavy gauged tomatoes cages like I did last year but I am trying a few improvements. I have noticed in the 6 years I have grown tomatoes that they still tend to flop over once they are full grown. To help solve this I am adding bamboo in the middle of the cage and I will tie the plant along the stake with Velcro Plant Ties. I really like these ties, a 30' roll is pretty cheap, they are reusable and you don't have to tie knots with them. No affiliation by the way, I just like them.

After planting the barrel I moved on to plant the sunflower seeds that the Great Sunflower Project sent me. With the free seed they want the recipient to submit bee counts twice a month which I will gladly do. I planted them in behind the oak barrel so they do not create a shade problem for my veggies. Once the seed was in I covered them with chicken wire so the squirrels/birds don't eat them all. We feed the birds with black oil sunflower seeds so I didn't want them thinking this is their food too.

Now for what I need to accomplish this weekend but I am sure will not all get done:
  • plant the remaining 10 tomatoes
  • build a 2x2 trellis with trellis netting for the melons
  • build a bamboo trellis for the pole beans, post to come about that
  • install black plastic on the pepper & melon bed
  • finish the new bed around the oak barrel, this bed will house potted herbs, tomatoes & potatoes. It will also have rhubarb and some herbs planted in the soil. Another post to come
  • plant three compost bags with early red potatoes, a bit of an experiment to have early potatoes
  • clean and move the cold frame into the basement
  • install the hose reel & post
  • finish planting all the annuals in the urns & pots
  • weed, weed & weed some more
  • cut the lawn
  • yikes!


I will end with a photo of the remaining greens where the tomatoes will be planted. One row of spinach has been harvested and the row of radishes as well. The rest of the spinach will be blanched & froze and it looks like we better start eating more lettuce. The lettuce is so pretty you almost don't want to harvest it.

*my next post will be an overall garden update.

Thursday, May 21, 2009

Thurdays Garden Meal

On today's garden menu is White Pizza. If you are just checking in every Thursday I try to make a meal that uses garden produce well excluding store bought produce & for the most part meat. So here we go:

The Harvest

First I harvested way to much spinach and there is at least this much more in the garden that needs harvesting. The left over as well as what is still in the garden will be blanched and froze tomorrow. I then harvested another immature garlic. You may think this is garlic sacrilege but I planted them to closely. Thinning them now will allow the other bulbs to grow larger plus it is kind of nice to have fresh garlic when needed.

The Recipe
  • Pizza Dough (homemade or store bought)
  • garlic
  • 2 tablespoons butter or olive oil
  • mozzarella cheese
  • couple handfuls of spinach
  • ricotta
  • Parmesan cheese
Start by pre-heating your oven to its highest setting, I used 525f. Now clean the spinach, remove the stems and then dry the leaves. Then stretch your dough to form the pizza. Once that is done chop the garlic finely and mix with the butter or oil. Then spread this mixture on the dough. Top that with grated mozzarella cheese, followed by the spinach and then add spoon fulls of ricotta on the top. Place it on a pizza stone or sheet pan and bake until brown and cooked through. Serve with a sprinkling of Parmesan.

This was the first time trying a white pizza so I was a bit hesitant but it did turn out very nice. The carnivore in me wanted grilled chicken on top but then it wouldn't be a garden meal anymore, ho-hum.

Wednesday, May 20, 2009

Upside down planting and conventional planting.

Today was a beautifully warm day, it topped out at 26c(79f) and tomorrow is supposed to be even warmer. Perfect timing to start planting the tomatoes and I started with the upside down ones. I first had to figure out how high to hang them. I choose 9 feet high to account for the length of the container (30"), the height of the plant in the container (36") and the tomato plants growing below them (36"). Good thing I am over 6 feet tall and have a watering wand. Here is how they are planted:

In the bottom they have this white foam
disk with a slit in it to support the plants stem.

You remove it and place it around the plants stem.

Then stuff the plants root ball into the bottom followed by the disk.

I filled the planters with a mix of 3/4 potting soil & 1/4 compost.
Well filling I stuck my hand into the top and supported the root ball/stem
until there was enough soil to hold it in place. Once it was supported
I finished filling, leaving a 3" void at the top for watering.

I then hung them in place and installed the top cap.

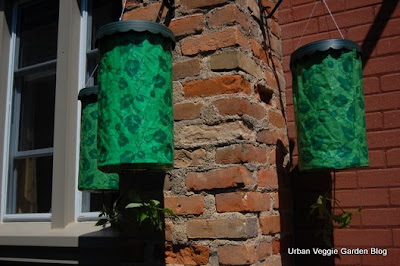
Here they are all planted, pretty ugly I must say, maybe I will spray
paint them next year with krylon plastic paint. Starting on the window
side we have Black Cherry, the middle one is Black Zebra which I save
the seed from grocery store produce and the one on the other end is
Chocolate Stripe. I choose to only plant small fruited tomatoes in them
for obvious reasons.

I then planted 'bright lights' chard, tatsoi, deer tongue lettuce, australian yellowleaf lettuce and a red lettuce that I have lost the name of. They were all planted in the top bed by the potato bin. I also managed to plant the window box under the second story window. It will look much like last years window box(at the bottom of the link) but I added some veggies this year, cardoon & tuscano kale. Here are some photos of the planting:

Before ripping the chard apart for planting I noticed their roots
are as colourful as their stems, aren't they cool. The seed for this
chard came from Daphne's Dandelions.

Here are all the wee greens planted. This area is partial sun due to the hedge
so it should be an excellent spot to extend the green harvests into the warmer
months. The big void will be melons trellised against the wall. That part
of the bed bakes in sun all day. Funny how a small bed can be so diverse.